
How To: Tying the Rodeo Crab
The Rodeo Crab Fly
In this tutorial we will be tying the Rodeo Crab, a refined variant of the classic Aphlexo Crab or Flexo Crab fly. Tied with durable Flexo Crab Tubing, its semi-translucent body allows light and surrounding bottom colors to show through, creating the natural appearance of a live crab. Combined with a wide, lifelike profile and subtle movement on every strip and pause, it's a pattern that consistently earns confident eats from shallow-water predators.
The Rodeo Crab excels at landing softly, sinking naturally, not absorbing added water weight, and rides hook point up to help minimize hang-ups around grass and shell. Built with premium materials and designed to withstand fish after fish, this is the crab fly you'll reach for whenever crustaceans are on the menu.
In this tutorial, we’ll walk you through each step of tying the Rodeo Crab in the Tan/Blue Crab color, covering the materials and techniques that make this fly so effective. Whether you’re an experienced tyer looking to expand your arsenal or new to fly tying, this guide will help you create a fly that’s perfectly suited for targeting Redfish, Permit, Black Drum, Sheepshead and more. Let’s get started and bring the Rodeo Crab to life!
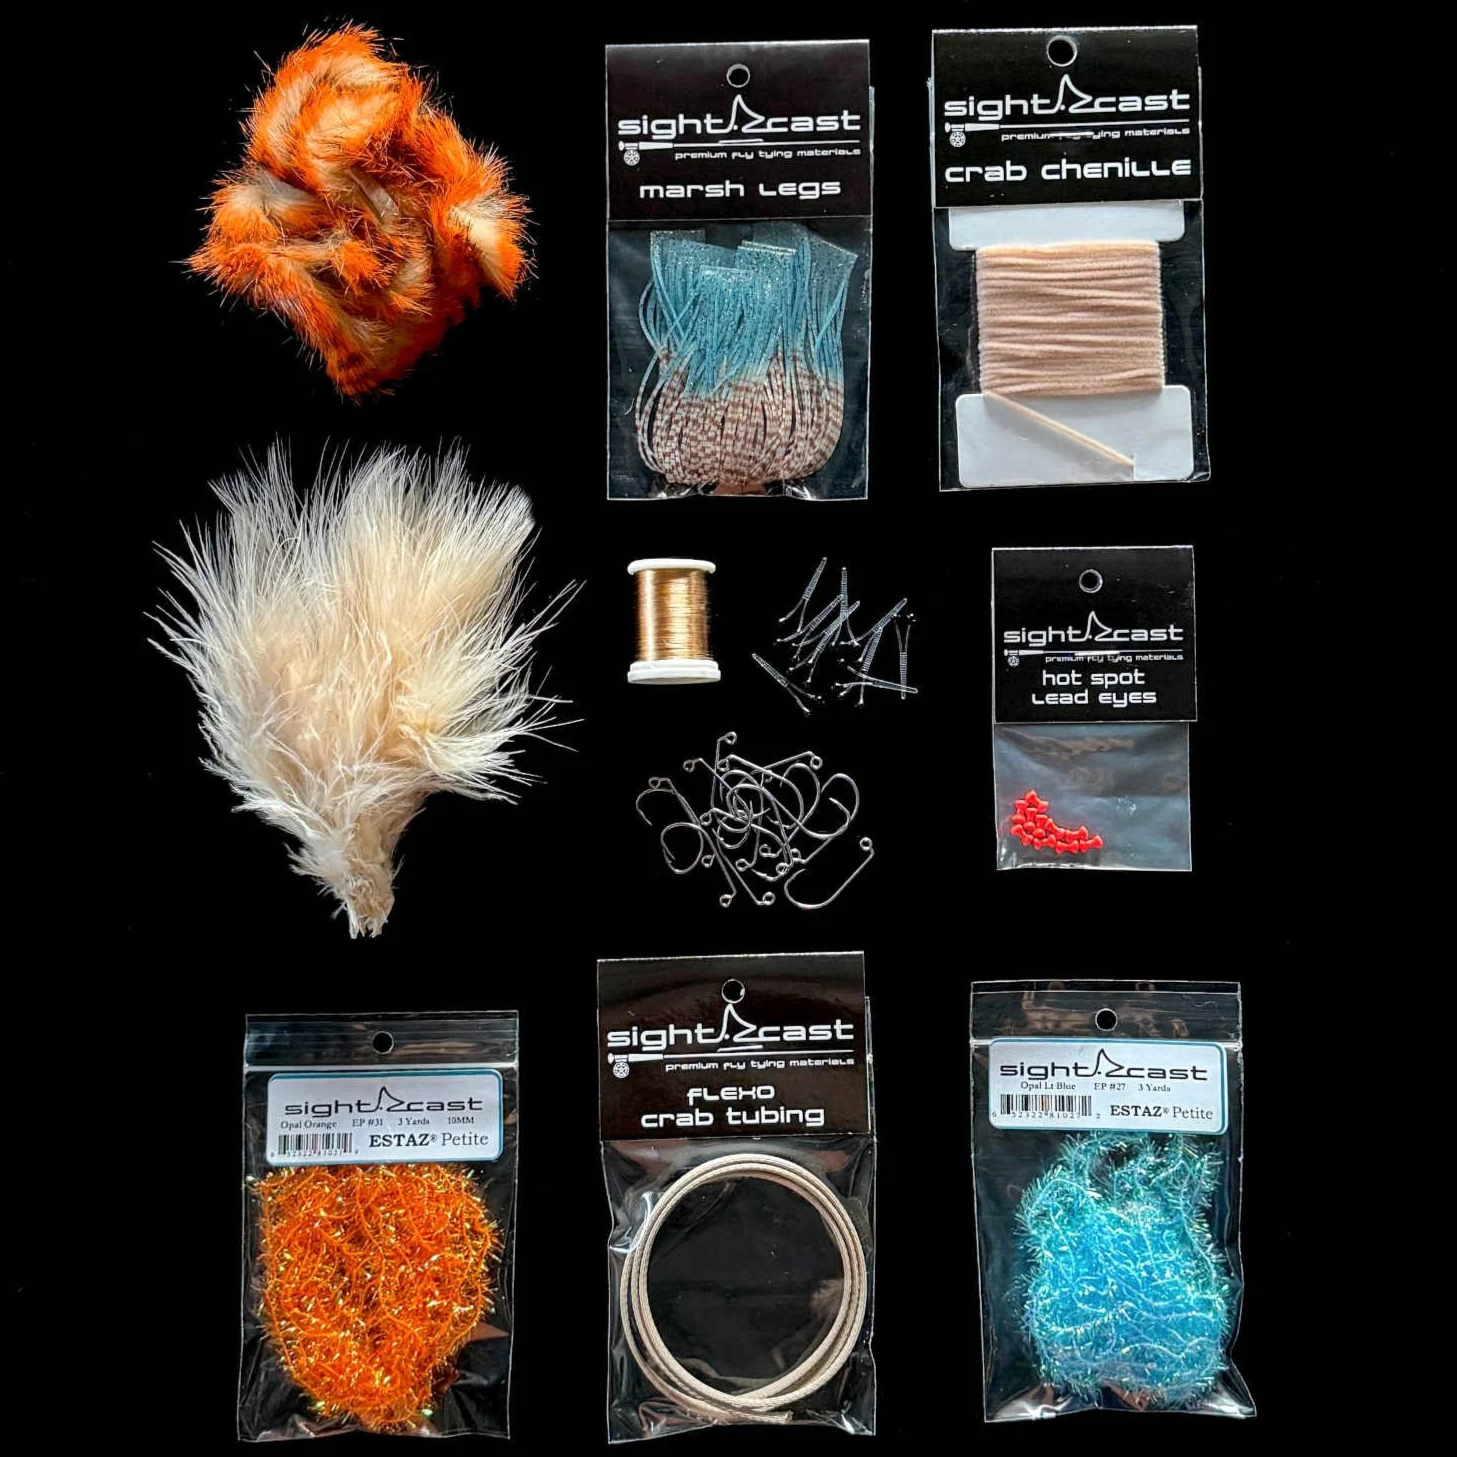
FLY TYING MATERIALS
(scroll down to the bottom to see the recipes for six effective color combinations)
Lead Eyes (X-Small): Hot Spot Lead Eyes
Eyes: Easy Shrimp Eyes
Hot Spot: Estaz Petite
Mouth: Rabbit Strip
Legs: Marsh Legs
Claws: Crab Chenille
Collar: Marabou
Shell: Flexo Crab Tubing
Body: Estaz Petite
Thread: SCFC Flat Waxed Nylon
Hook: Size #4 - Ahrex SA254 Jig Hook
HOW TO TIE A RODEO CRAB FLY

STEP 1:
Start by building a solid base of thread on the hook shank and then tie in some Hot Spot Lead Eyes about 3/8” from the eye of the hook.
Depending on the hook you are using, this will roughly be about half way on the hook shank, leaning slightly towards the eye. This will allow for plenty of room to tie in the remaining materials.

Step 2:
Wrap your thread past the bend of the hook and secure a pair of Easy Shrimp Eyes. The eyes should slightly bend upward following the bend of the hook.

Step 3:
Tie in a piece of Estaz Petite and wrap approximately 3-4 times at the bend of the hook. When finished, the Estaz should be level with the top of the hook shank.
This is commonly called a “Hot Spot” or “Egg Sack”. It provides a pop of color and helps keep the tail material propped up to avoid fouling.
Tip: When wrapping the Estaz, criss-cross between the Easy Shrimp Eyes a few times to help splay the eyes outward.

Step 4:
Cut and remove a small portion of Rabbit Hair from the rabbit hide and tie in on top of the hook shank just in front of the hot spot.

Step 5:
Tie in two Marsh Legs. Spread the legs to both sides of the fly. Half on the left side, and half on the right side. Trim them to approximately 1.5” in length.
Note the position of the thread as it hangs from the bobbin. After tying in the legs, the thread should be in line with the point of the hook, or close to it. This is a good measurement of the tie in location for the next step.

Step 6:
Following the “How To: Making Crab Claws” tutorial, create two crab claws using Crab Chenille.
Color the claw tips with your choice of permanent marker color. In this example, a Copic marker using the Orange YR04 is used.
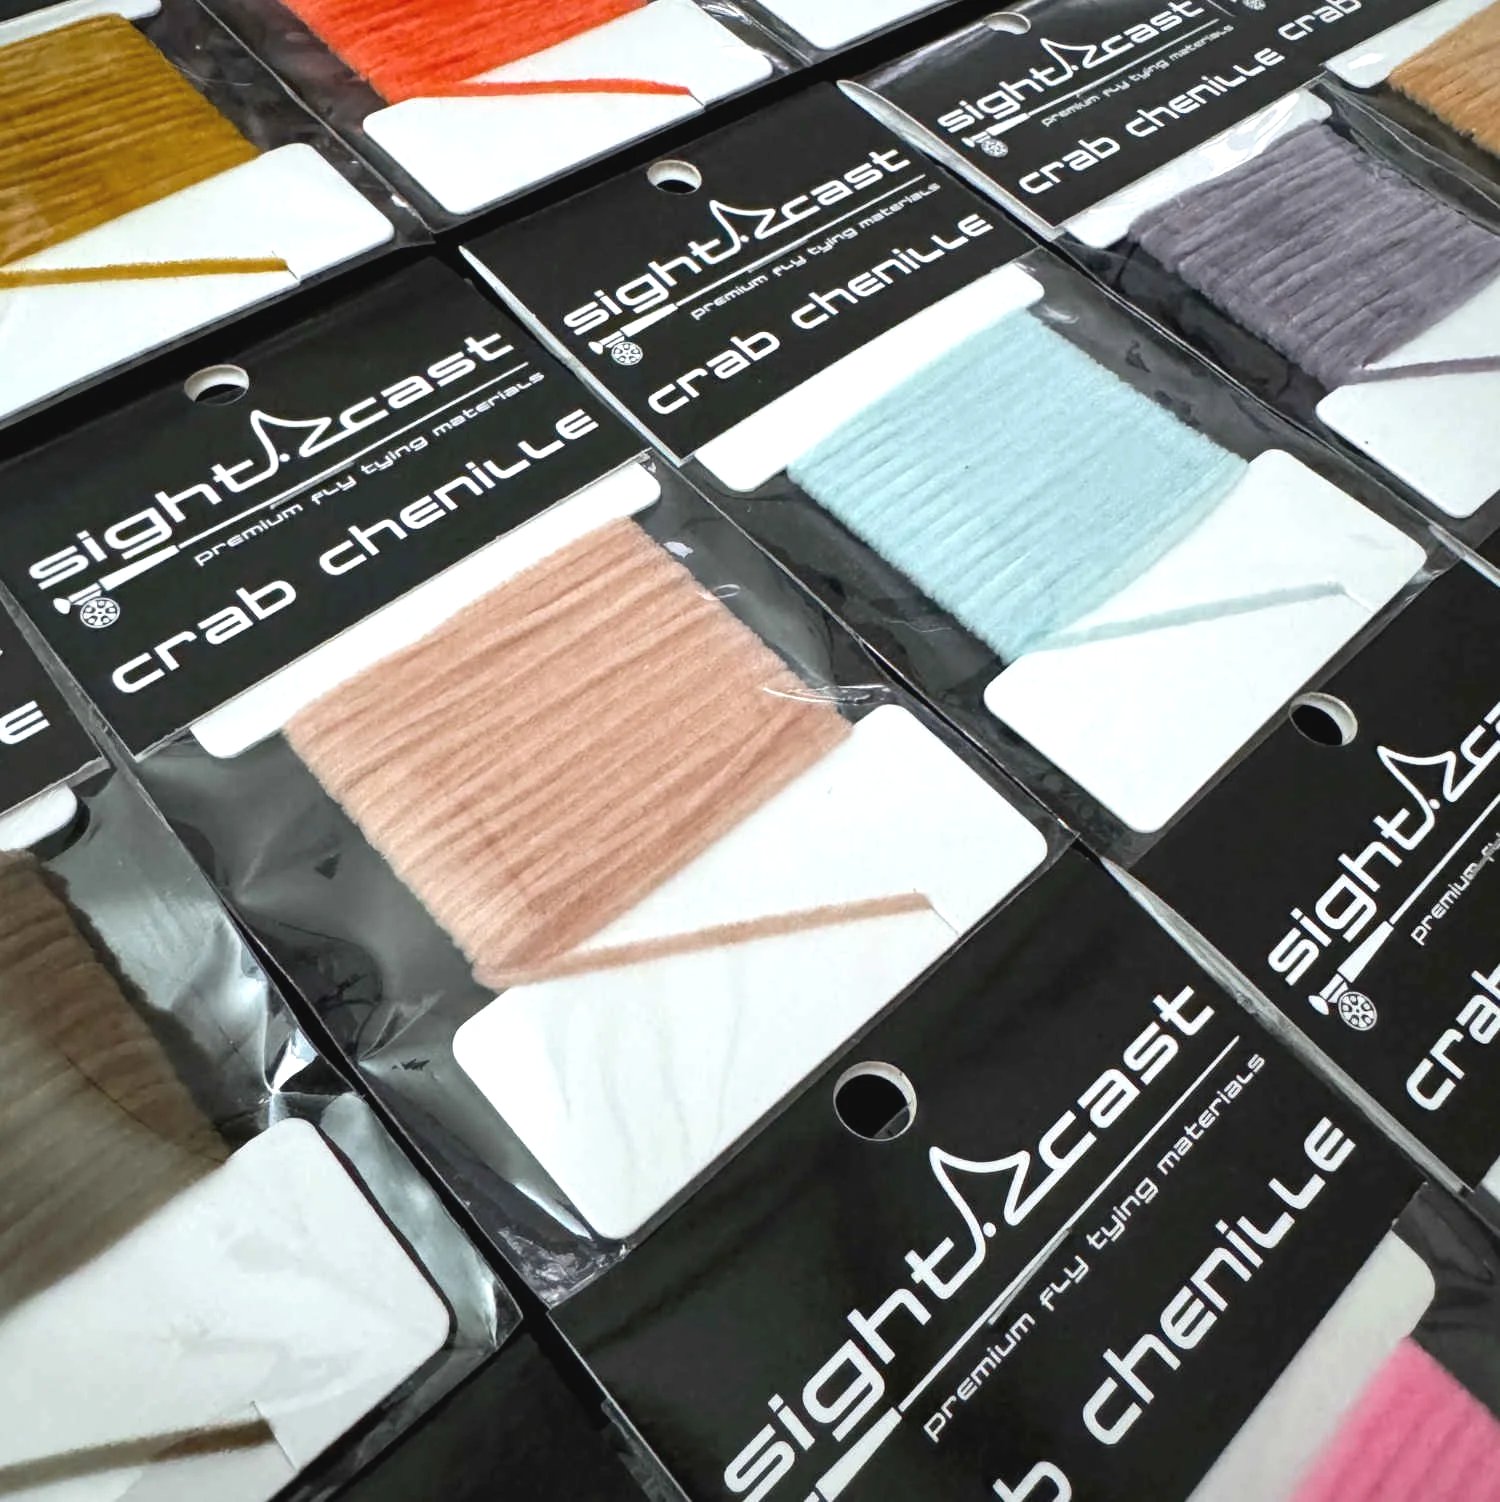
A 2mm chenille with a glue-fused core to prevent unraveling. Unmatched durability, multiple color options, and the perfect size for all your crab claws, crab legs, worm flies, and more.
For complete illustrated instructions on how to make Crab Claws, check out the article under the “Tutorials” menu section: How To: Making Crab Claws

Step 7:
Tie in the two crab claws on each side of the hook. One claw on the left side and the other on the right side of the hook shank.
The claws should extend about 1” in length.
Trim off the excess Crab Chenille and cover completely with thread.

Step 8:
Next, take a few pinches of Marabou and tie in to form a collar.
Tie in a small pinch on top of the hook shank and use your fingers to spread the feathers evenly around the top of the hook shank.
Flip the fly over and do the same on the bottom on the hook shank. After completed, the Marabou should be evenly spread around the entire fly.
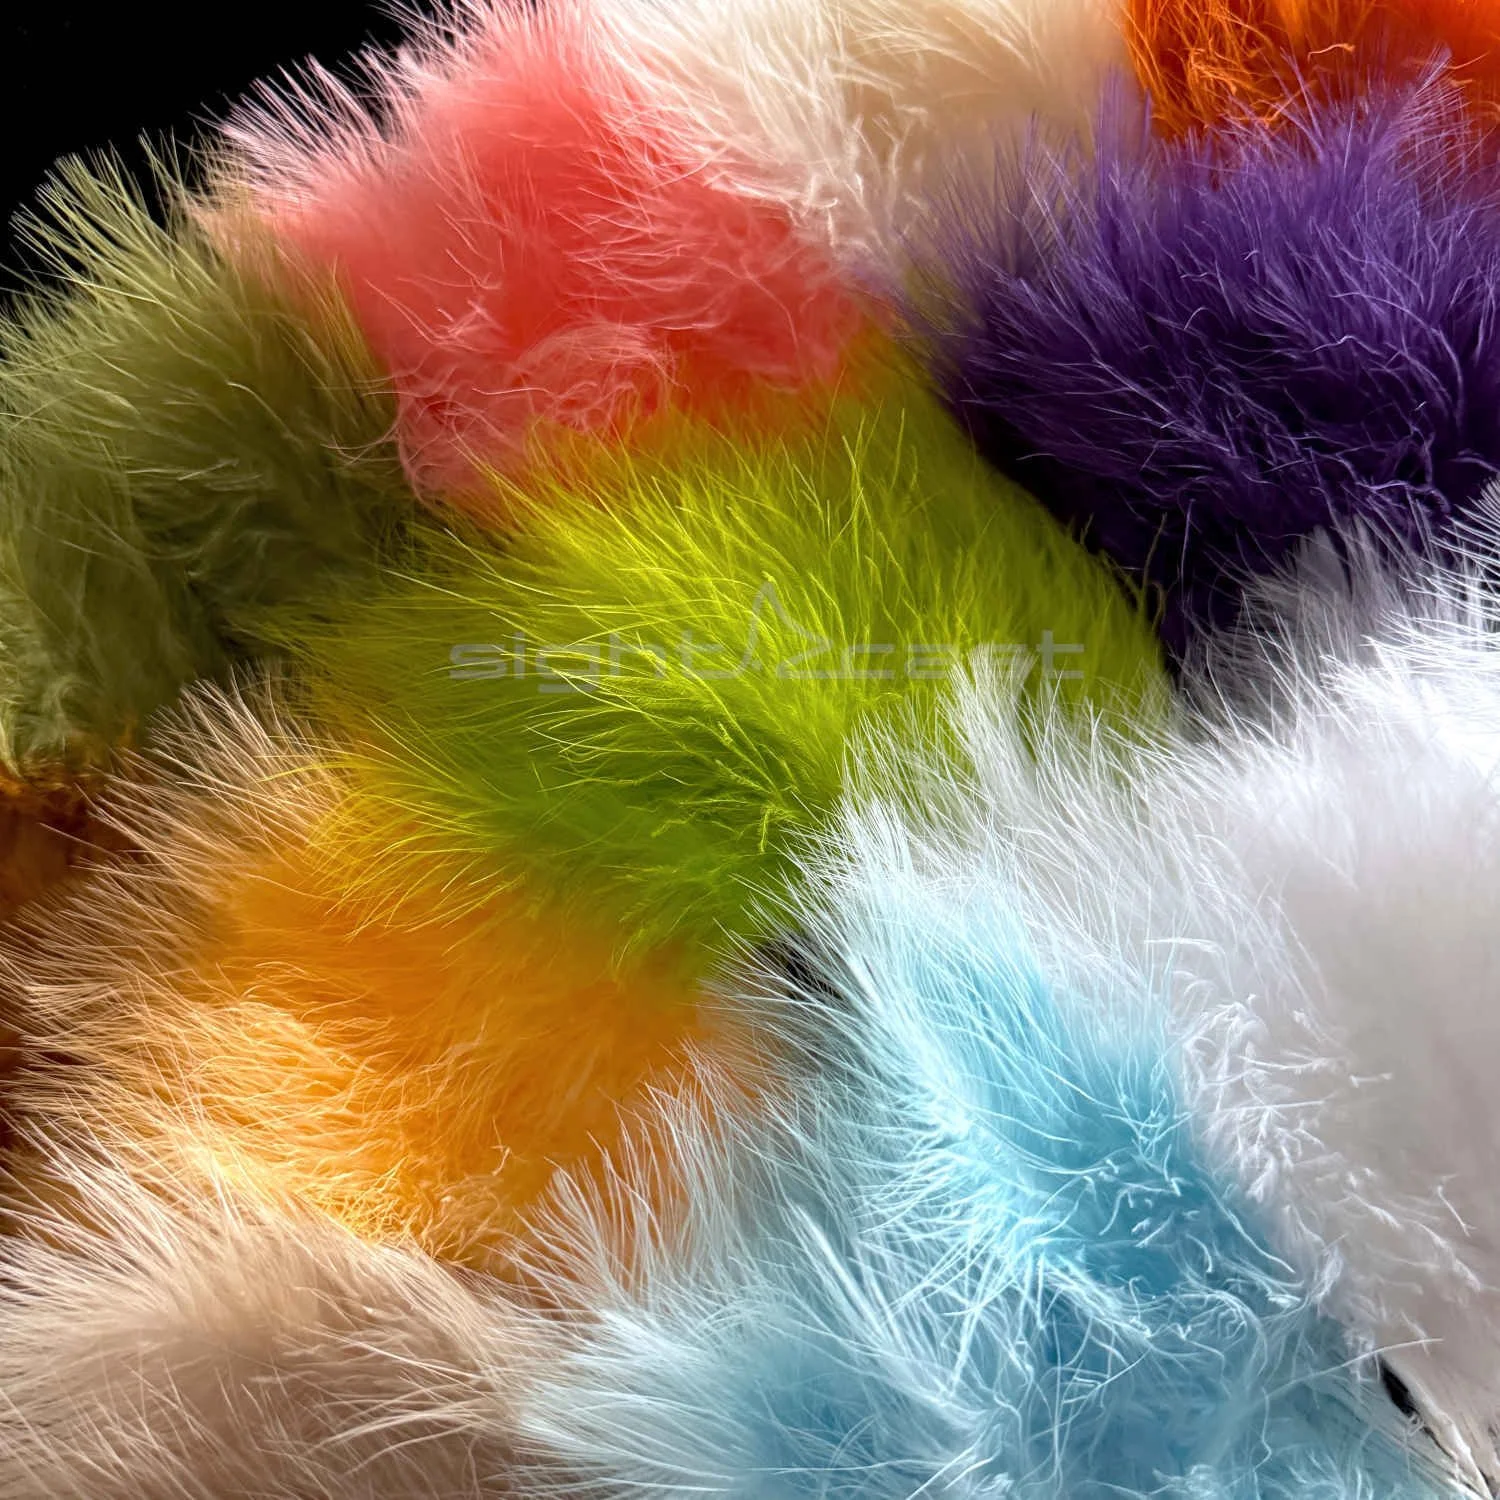
Hand-selected specifically for saltwater fly tyers who want maximum movement and natural flow in their flies. With long, full feathers measuring approximately 6–8 inches, it is ideal for tails, collars, throats, and full-body applications.
This marabou breathes and pulses effortlessly in the water, creating an irresistible lifelike action that shines in baitfish patterns, streamers, and larger saltwater flies where motion is everything.

Step 9:
Cut a piece of Flexo Crab Tubing to 1.75”.
It is highly recommended to cut the tubing with a hot knife or Cautery Tool.
Cutting the tubing with scissors will result in a frayed end that will not be easy to work with. If you have to cut with scissors, you can use a lighter to singe the ends to prevent the fraying.

Step 10:
Prior to this step, put in a few half-hitches or whip finish the thread and then cut and set the thread aside.
Then slide the Flexo Crab Tubing over the eye of the hook and continue pushing it all the way to the back of the fly.

Step 11:
Continue pushing the Flexo Crab Tubing all the way to the back of the fly until it is past the lead eyes.

Step 12:
Start your thread again and tie in the Flexo Crab Tubing behind the lead eyes. Be sure to wrap the thread tightly to firmly secure the tubing in place.
Apply some head cement or your favorite glue for added durability.
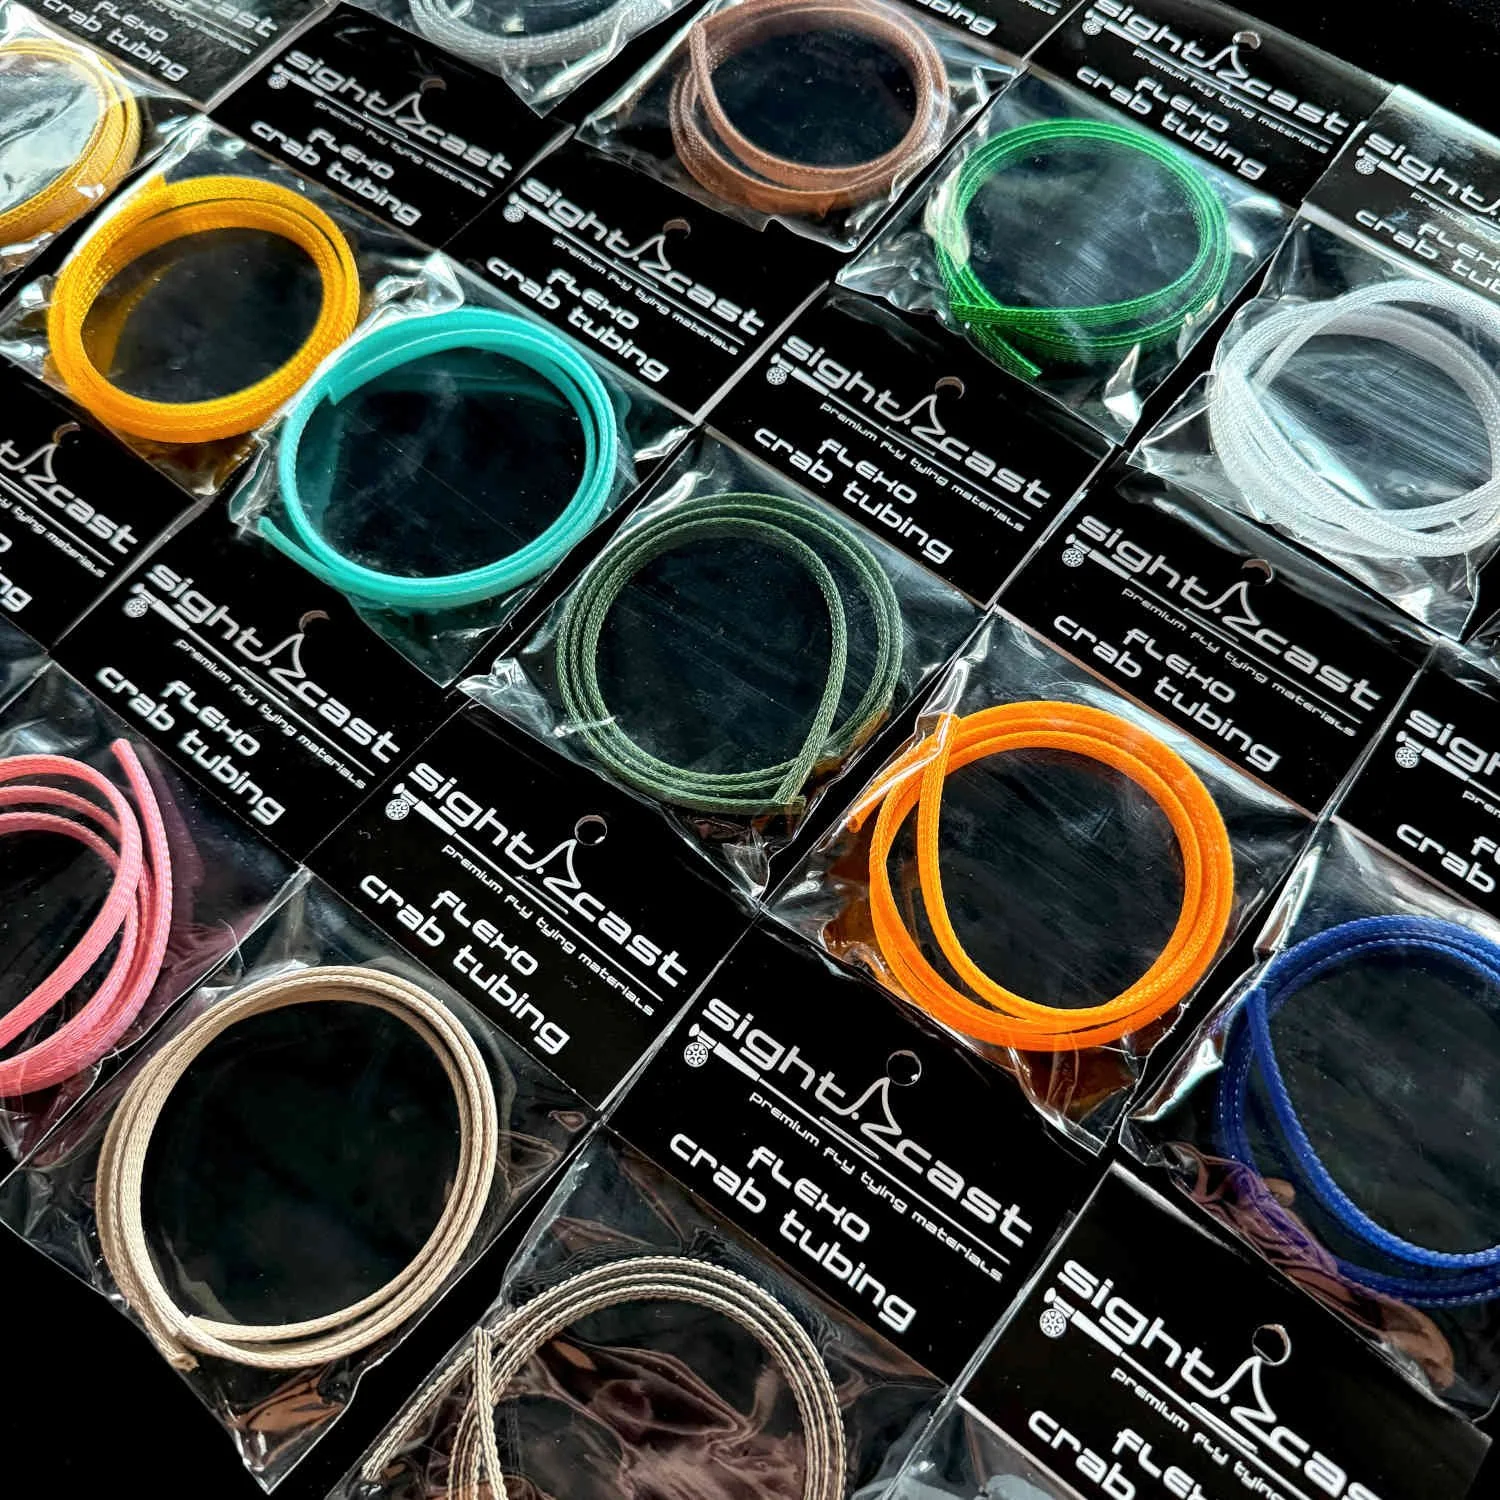
This is the good stuff! Soft, flexible, easy to work with, and super durable.
Available in 18 colors. Take your crab fly patterns to the next level with this semi-translucent, mesh construction that mimics the segmented look of natural crab bodies. Strong enough to hold up to aggressive strikes, yet flexible enough to tie in easily without bulk.

Step 13:
Tie in some Estaz Petite and continue wrapping to the front of the hook.
This Estaz will shine through the Flexo Crab Tubing offering a hint of flash and contrast of color.
Be sure to crisscross over the lead eyes and cover all exposed thread.
Leave approximately 1/8” of room at the eye of the hook to tie in the remaining materials.

Step 14:
Now it is time to push the Flexo Crab Tubing towards the front of the fly. Turning the tubing inside-out, continue pushing it towards the eye of the hook.

Step 15:
After you push the Flexo Crab Tubing to the front of the fly, spend some time to prepare the tubing before tying it down. Use your fingers to shape, spread open, and align the tubing.

Step 16:
Capture the Flexo Crab Tubing with thread directly behind the eye of the hook. The whip finish the thread and cut.
Use you favorite head cement or UV Resin to cover the exposed thread to finish the fly.

The classic lead dumbbell eyes you know and love are now available in 19 fishy colors that are sure to compliment any color fly you’re tying up.

Step 17:
After the tying is completed, use your fingers to position, spread open, and shape the Flexo Crab Tubing to mimic a crab shell shape.
Step 18:
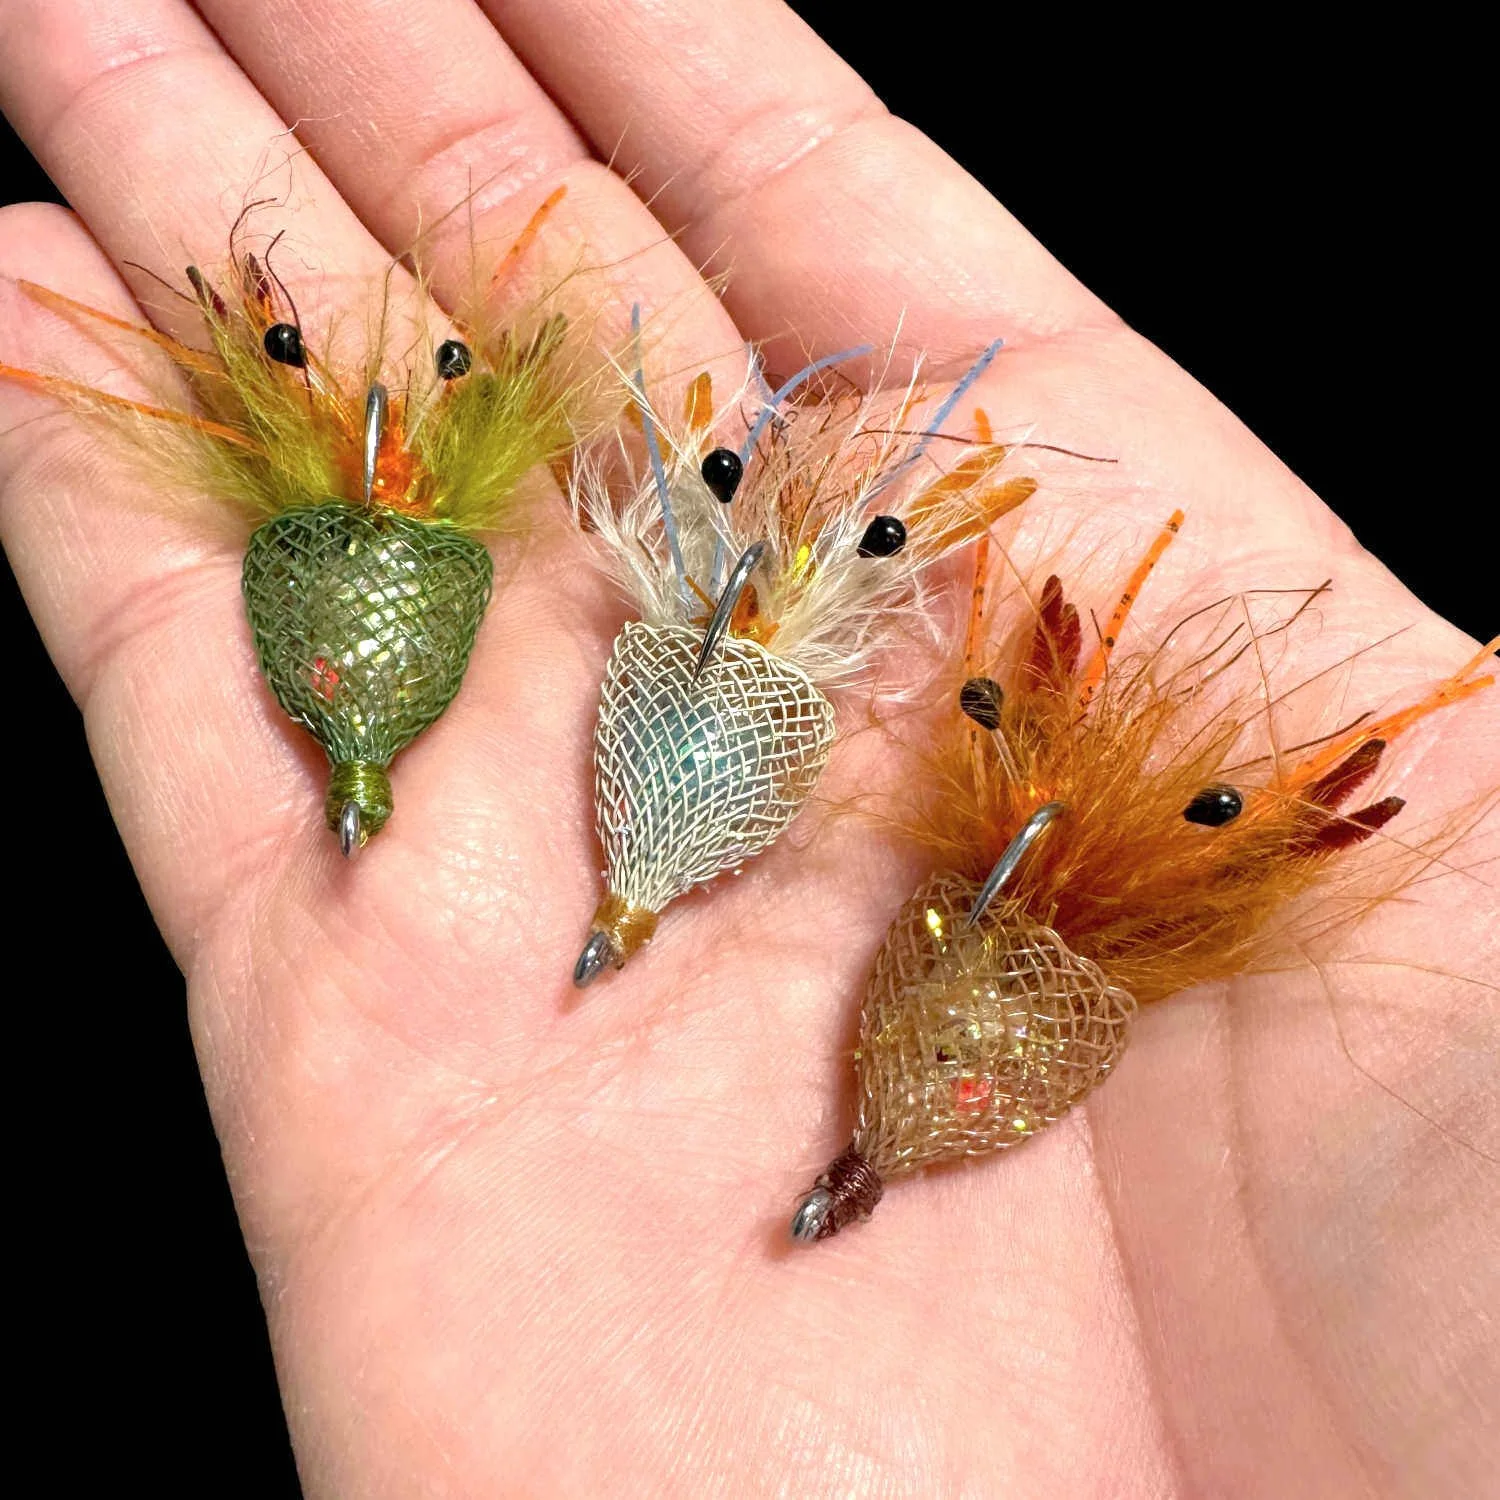
Here are some examples of different color combinations and the desired shape and proportions you can aim towards.
See below for the recipes of six effective color combinations of the Rodeo Crab.

Finished:
The Rodeo Crab built with these premium materials is designed to withstand fish after fish, and provide unmatched durability whenever crustaceans are on the menu.
This is a great crab pattern for chasing Redfish across a mud flat, dropping it in front of a cruising Black Drum, or targeting Permit over turtle grass. The Rodeo Crab lands softly, sinks naturally, and rides hook point up to help minimize hang-ups around grass and shell.
Olive/Orange
Lead Eyes (X-Small): Hot Spot Lead Eyes - Orange
Eyes: Easy Shrimp Eyes - Black
Hot Spot: Estaz Petite - Orange
Mouth: Rabbit Strip - Crawfish Orange
Legs: Marsh Legs - Gold/Brown - Orange Tip
Claws: Crab Chenille - Olive
Collar: Marabou - Olive
Shell: Flexo Crab Tubing - Olive
Body: Estaz Petite - Opal Sand
Thread: SCFC Flat Waxed Nylon - Olive
Hook: Size #4 - Ahrex SA254 Jig Hook
Tan/Blue
Lead Eyes (X-Small): Hot Spot Lead Eyes - Orange
Eyes: Easy Shrimp Eyes - Black
Hot Spot: Estaz Petite - Orange
Mouth: Rabbit Strip - Crawfish Orange
Legs: Marsh Legs - Sand/Brown - Blue Tip
Claws: Crab Chenille - Beige
Collar: Marabou - Tan
Shell: Flexo Crab Tubing - Tan
Body: Estaz Petite - Opal Blue
Thread: SCFC Flat Waxed Nylon - Tan
Hook: Size #4 - Ahrex SA254 Jig Hook
Brown/Rust
Lead Eyes (X-Small): Hot Spot Lead Eyes - Rust
Eyes: Easy Shrimp Eyes - Black
Hot Spot: Estaz Petite - Orange
Mouth: Rabbit Strip - Crawfish Orange
Legs: Marsh Legs - Copper/Brown - Orange Tip
Claws: Crab Chenille - Brown
Collar: Marabou - Rootbeer
Shell: Flexo Crab Tubing - Brown
Body: Estaz Petite - Opal Sand
Thread: SCFC Flat Waxed Nylon - Rootbeer
Hook: Size #4 - Ahrex SA254 Jig Hook
Purple/Black
Lead Eyes (X-Small): Hot Spot Lead Eyes - Red
Eyes: Easy Shrimp Eyes - Midnight Purple
Hot Spot: Estaz Petite - Red
Mouth: Rabbit Strip - Barred Bright Purple
Legs: Marsh Legs - Clear/Black Purple Tip
Claws: Crab Chenille - Purple
Collar: Marabou - Purple
Shell: Flexo Crab Tubing - Purple/Black
Body: Estaz Petite - Opal Purple
Thread: SCFC Flat Waxed Nylon - Purple
Hook: Size #4 - Ahrex SA254 Jig Hook
Sand/Orange
Lead Eyes (X-Small): Hot Spot Lead Eyes - Orange
Eyes: Easy Shrimp Eyes - Black
Hot Spot: Estaz Petite - Orange
Mouth: Rabbit Strip - Crawfish Orange
Legs: Marsh Legs - Gold/Brown - Orange Tip
Claws: Crab Chenille - Sand
Collar: Marabou - Sand
Shell: Flexo Crab Tubing - Electric Sand
Body: Estaz Petite - Opal Sand
Thread: SCFC Flat Waxed Nylon - Sand
Hook: Size #4 - Ahrex SA254 Jig Hook
White/Yellow
Lead Eyes (X-Small): Hot Spot Lead Eyes - Yellow
Eyes: Easy Shrimp Eyes - Black
Hot Spot: Estaz Petite - Rootbeer
Mouth: Rabbit Strip - Barred Gold Variant
Legs: Marsh Legs - Gold/Brown - Gold Tip
Claws: Crab Chenille - White
Collar: Marabou - White
Shell: Flexo Crab Tubing - Clear
Body: Estaz Petite - Opal Whtie
Thread: SCFC Flat Waxed Nylon - Gold
Hook: Size #4 - Ahrex SA254 Jig Hook
Sight Cast Fishing Company
We provide a line of products that are designed for those that live and breathe the shallow flats and backwater marshes. Our passion is saltwater fly fishing and we aim to provide top quality flies and fly tying materials designed for the Gulf Coast fly fisherman. Many of the materials used in this fly are available in the Tying Materials section of the website. You can also purchase this fly and many others that are already tied up and ready to fish in the Fly Shop. Good luck out there on the water!