
How To: Tying the Straight Shooter Crab Fly
How to Tie a Crab Fly - The Straight Shooter Crab
Inspired by a major part of a Redfish’s diet, the juvenile Blue Crab, this fly imitates one of the predominant food sources found on the shallow flats and backwater marshes during the Spring and into the early Summer. With the crab body positioned perpendicular on the hook shank and small weighted eyes up front, this fly will stand upright in a defensive posture with claws dancing in the current when resting on the bottom. Fish this fly slow and allow it to sink. Then with small, slow strips you will mimic the movement of a crab scurrying along the bottom. It is made to be extremely durable and can withstand lots of abuse before having to retire it. This fly is a must-have to anyone sight casting to Redfish, Black Drum, Sheepshead, Permit, or any other crab-eating fish species.
In this tutorial we cover how to tie the Straight Shooter Crab fly using the Easy Crab Shells in the Medium size and in the Tan color.

FLY TYING MATERIALS
(scroll down to the bottom to see the color list for three effective color combinations)
Eyes 1: Hot Spot Eyes (X-Small) - Silver
Eyes 2: Mono Dumbbells (Large) - Black
Hot Spot: Rabbit Strip - Orange/Tan
Claws: Crab Chenille - Beige
Under-Body: Estaz Petite - White
Legs: Marsh Legs - Clear/Brown - Blue Tip
Shell: Easy Crab Shells - Tan
Wing: Rabbit Strip - Tan
Thread: SCFC Flax Waxed Nylon - Tan
Hook: Size 4 - Daiichi 2546 or Ahrex SA210.
HOW TO TIE A CRAB FLY

STEP 1:
Start by tying in the Lead Eyes approximately 1/8” from the eye of the hook.

Step 2:
Wrap your thread to the bend of the hook and secure the mono eyes.
To ensure accurate placement of the mono eyes, use an Easy Crab Shell temporarily placed on the hook (directly behind the lead eyes) to gauge the right distance.

Step 3:
Cut and remove a small portion of rabbit hair from the rabbit hide.
Tie in the rabbit hair directly in front of the mono eyes.
This is commonly called a “Hot Spot” or “Egg Sack”. It provides a pop of color and added movement.

Step 4:
The next process is to make the two crab claws.
If you want to skip this step and use claws that are ready to go, check out the Easy Crab Claws.
Begin by taking a 4” piece of Crab Chenille, fold it in half, and then tie a knot at the folded end. Then cut the loop that is formed as shown in the image.

A 2mm chenille with a glue-fused core for unmatched durability, available in multiple color options, and the perfect size for all your crab claws, crab legs, worm flies, and more.

Step 5:
Next, use a lighter to slightly melt the tips of the claw.
Melting the tips of the claws adds durability by helping to prevent the Crab Chenille from unraveling and provides a more lifelike claw resemblance.
Be careful, the Crab Chenille is flammable and will catch on fire easily. A quick touch to the flame is all that is needed.

Step 6:
Finish the crab claws by coloring the tips with a permanent marker.
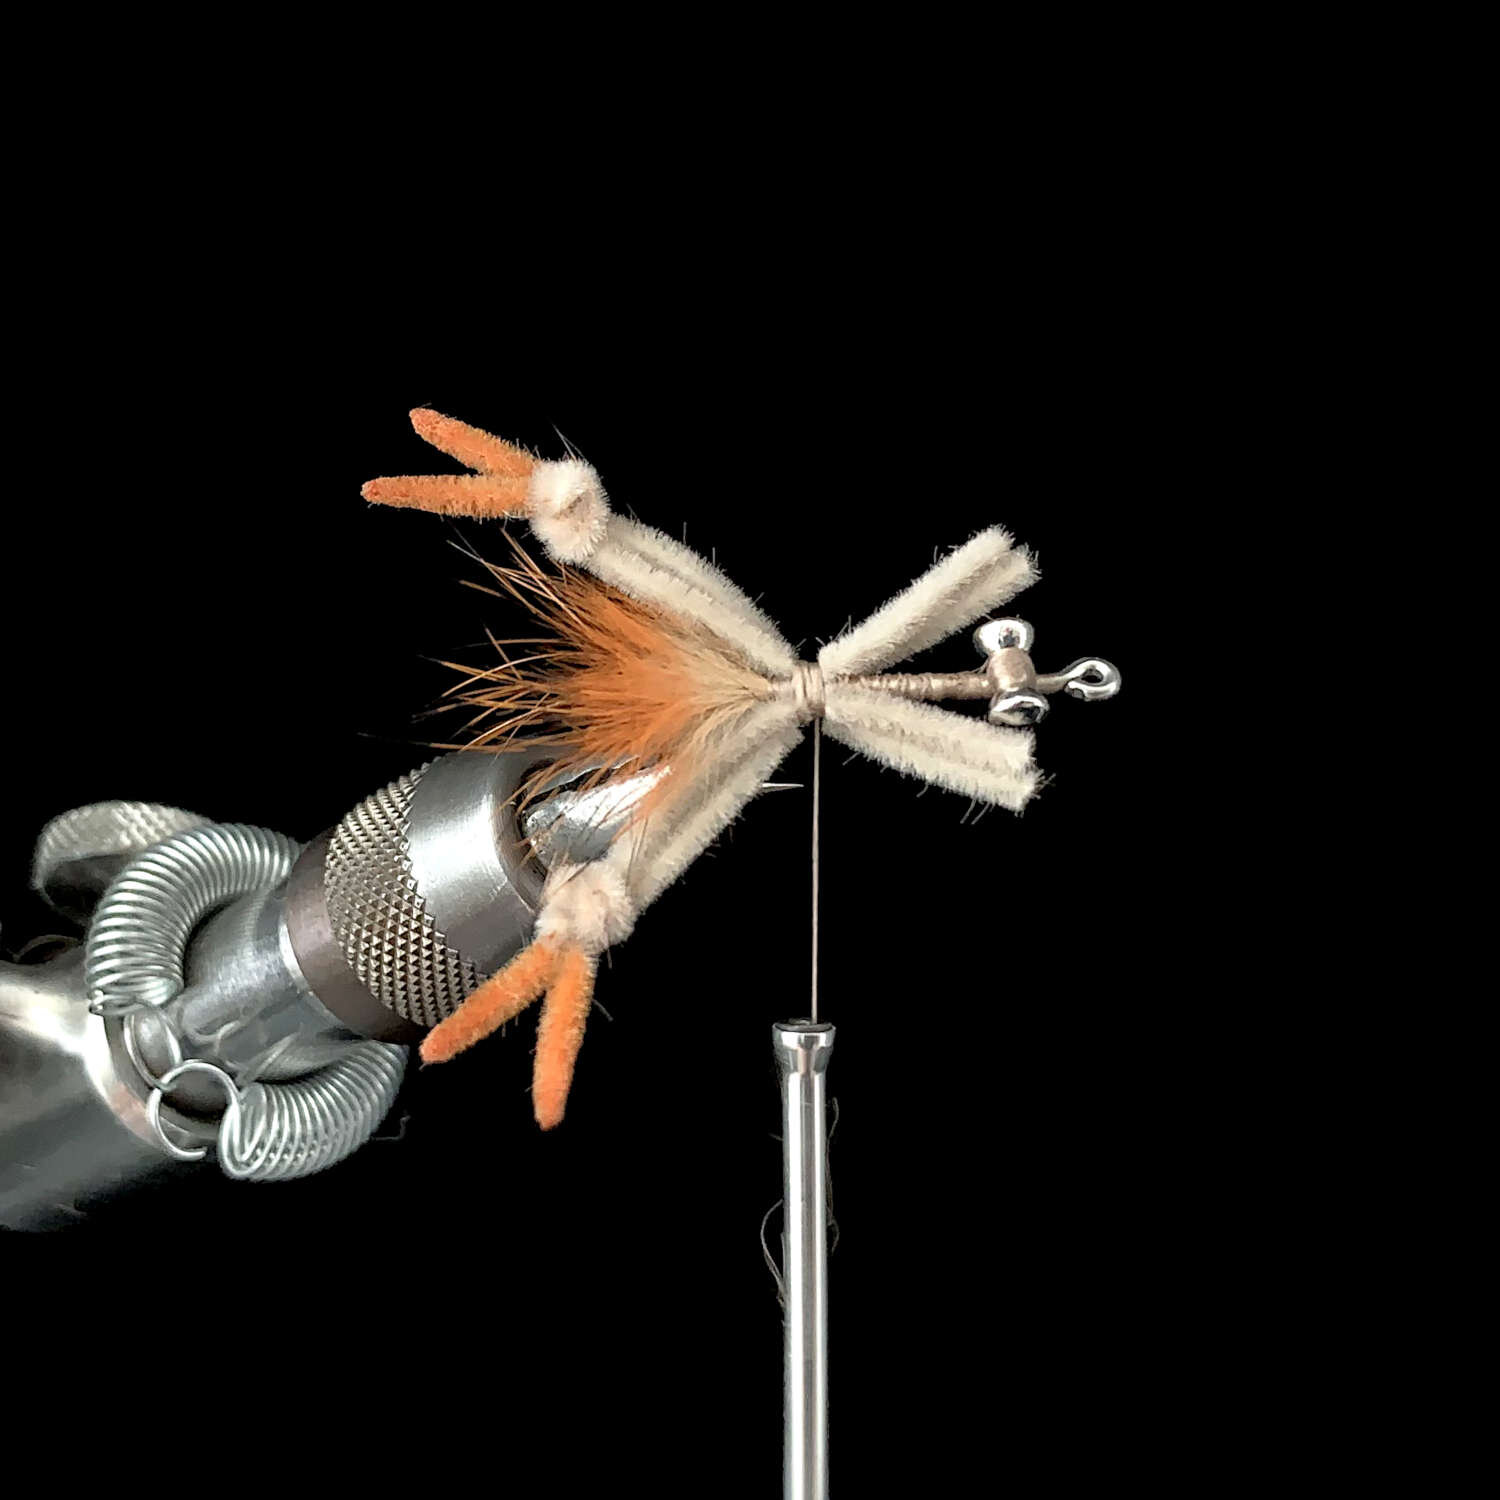
Step 7:
Tie in the two crab claws on each side of the hook. One claw on the left side and the other on the right side of the hook shank.
Leave a little space (1/8”) behind the mono eyes and the crab claw tie in location. This will help the crab claws point slightly rearward unobstructed.
The claws should extend about 1” in length.
Trim off the excess claw length and cover completely with thread.

Step 8:
Prepare the Easy Crab Shell by applying a few dots to both sides of the crab shell.
The Easy Crab Shell material takes permanent marker very well. You can get creative with multiple colors, shapes, and lines.
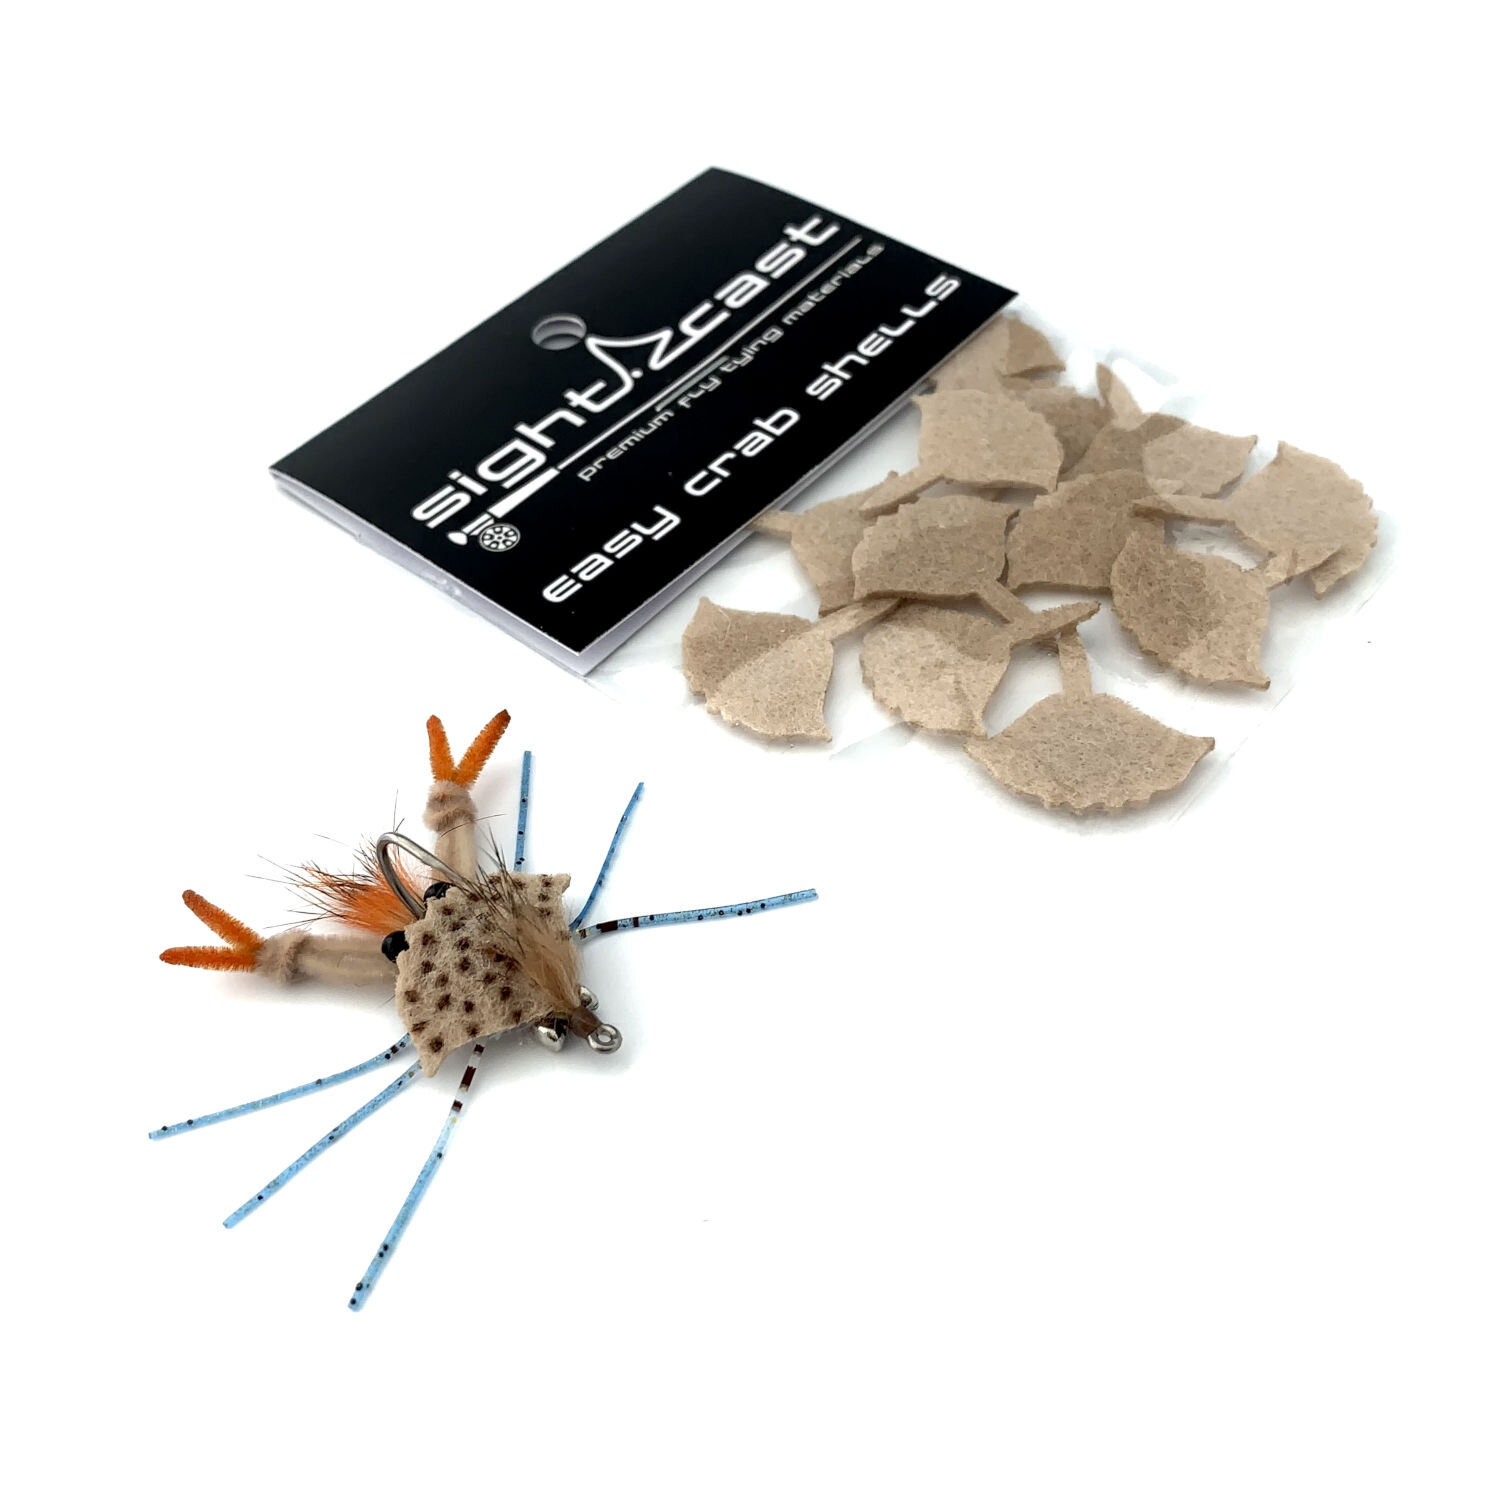
Easy Crab Shells feature a convenient “tie-in tab” that your thread will hold firmly in place ensuring accurate placement on the hook shank, help prevent twisting, and increase durability.
Available in 12 colors and 2 sizes.

Step 9:
Invert the fly in the vise and tie in the Easy Crab Shell directly behind the lead eyes and on the bottom of the hook shank.
Temporarily fold the crab shell back to gauge the proper distance. When folded rearwards, the crab shell should touch the mono eyes.
Once you are happy with the placement of the crab shell, cover the “tie-in tab” with thread and proceed to the next step.

Step 10:
Tie in a piece of Estaz Petite and set to the side.
Another great material to use instead of the Estaz is the Krystal Core Leech Yarn.
You will use approximately 5”.

Step 11:
The next process is to tie in 3 strands of Marsh Legs.
First, tie in one leg towards the rear as shown in the picture.
Use a few X-wraps over the leg to ensure that they will be positioned perpendicular to the hook shank.

Silicone legs designed specifically for saltwater fly patterns and are the perfect way to add movement, color, and dimension to all your shrimp, crab, baitfish, and crustacean flies.

Step 12:
Tie in the two remaining legs in a similar manner and spaced evenly apart from each other (approximately 1/8”).

Step 13:
Wrap the Estaz Petite forward. Use approximately 1-2 wraps between each segment of legs.
Be careful not to trap any legs or alter their positioning when wrapping the Estaz.
Use a few wraps of thread directly behind the lead eyes to secure the Estaz.
Step 14:
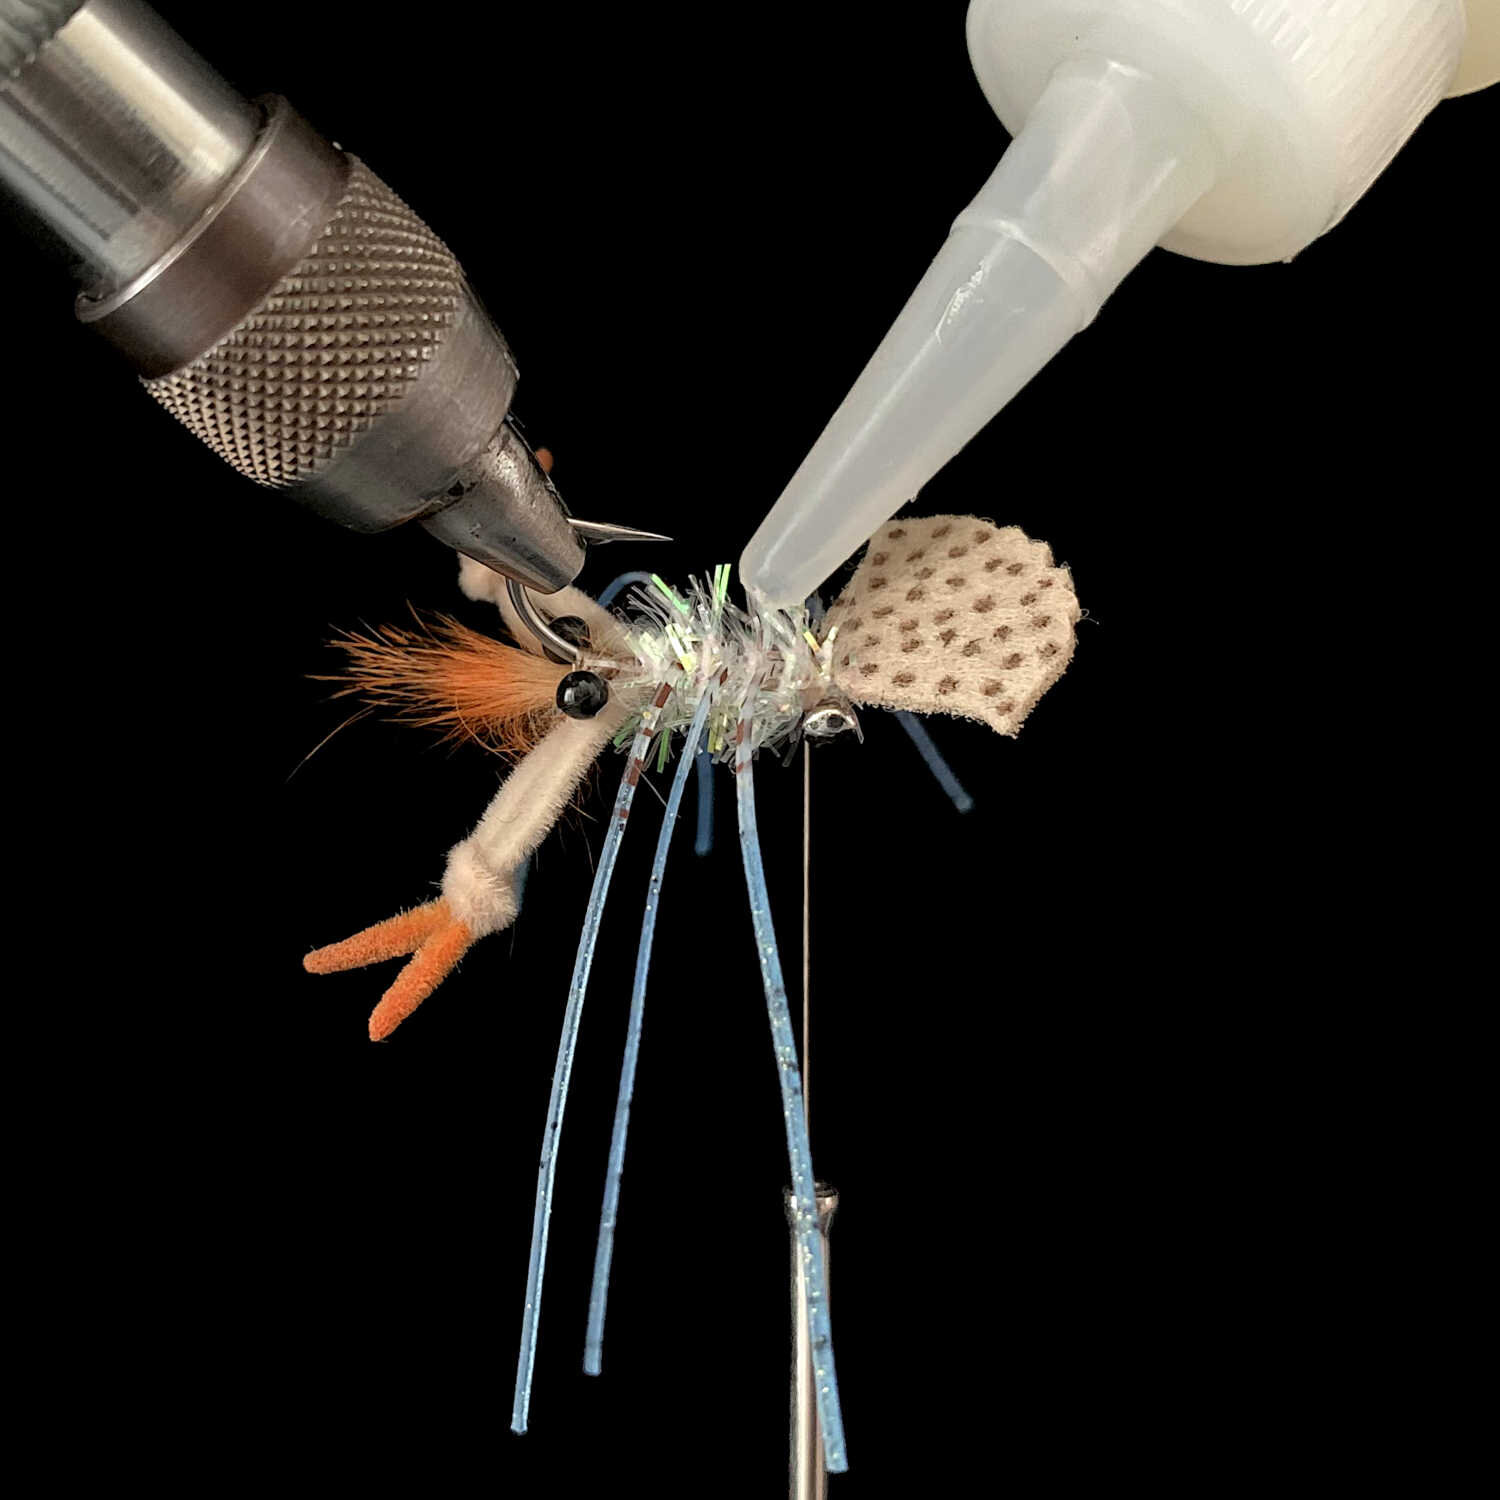
Apply a liberal amount of glue on top of the Estaz and on the back of the crab shell.
Good choices of glues for this purpose include Liquid Fusion, Loctite UltraGel, or E6000.

Step 15:
Fold the Easy Crab Shell back and use a small hair clip to firmly hold in place while the glue dries.

Step 16:
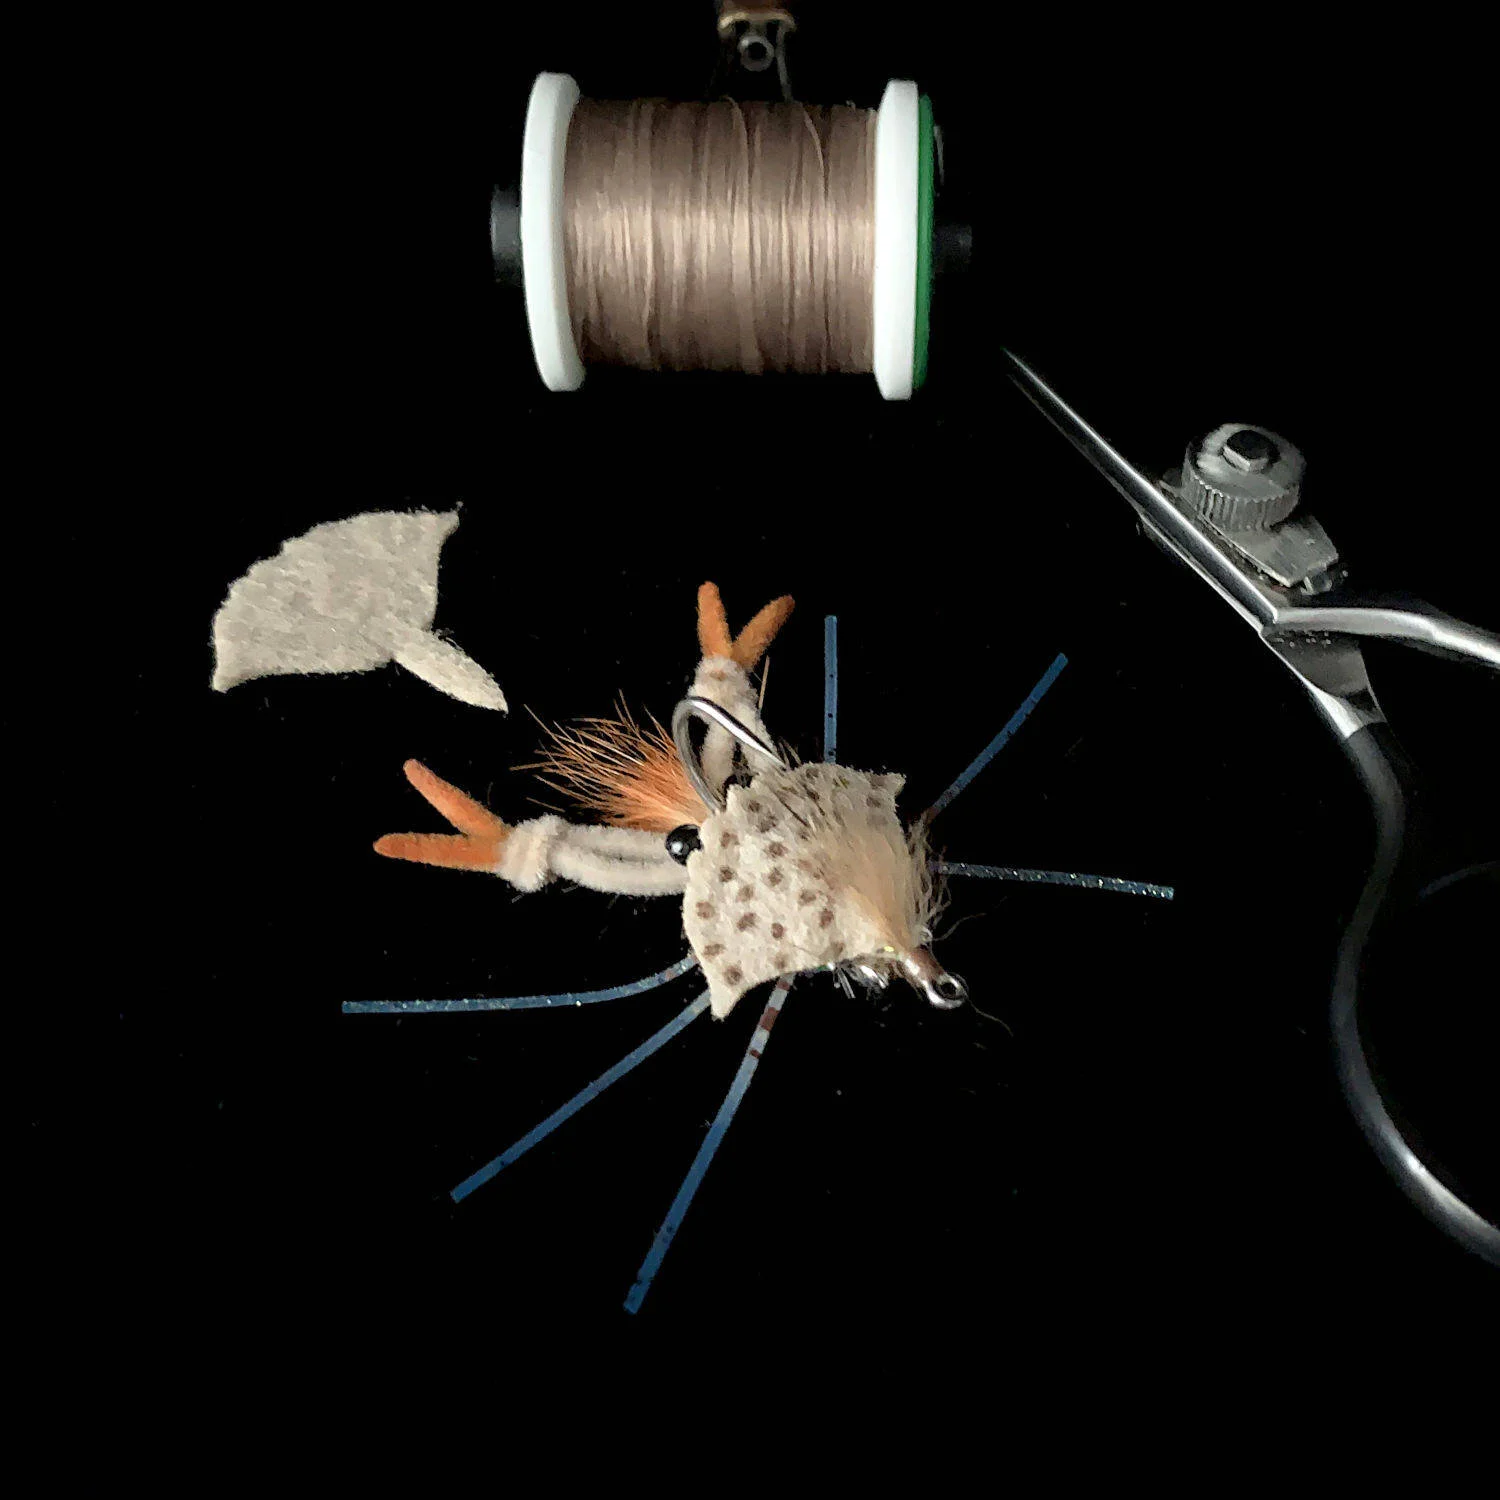
Cut and remove a small portion rabbit hair from the rabbit hide and tie in directly behind the eye of the hook. This adds a lot of movement to the fly, even when it is resting on the bottom.
Finish the fly by trimming the Marsh Legs to the desired length. Approximately 1” past the crab shell body.
Apply some Solarez UV Resin at the head of the fly to cover all the exposed thread to increase durability.
Finished:
The Straight Shooter Crab fly is a highly effective Redfish fly in the late Spring to early Summer when there are many juvenile Blue Crabs on the flats.
Some other popular color combinations include Sand/White, Brown/Orange, Olive/Tan, Black/Purple, and more.
Tan/White
Eyes 1: Hot Spot Eyes (X-Small) - Gold
Eyes 2: Mono Dumbbells (Large) - Black
Hot Spot: Rabbit Strip - Orange
Claws: Crab Chenille - Beige
Under-Body: Estaz Petite - White
Legs: Marsh Legs - Clear/Brown - Blue Tip
Shell: Easy Crab Shells (Medium) - Tan
Wing: Rabbit Strip - Tan
Thread: SCFC Flat Waxed Nylon - Tan
Hook: Size 4 - Ahrex SA210
Olive/White
Eyes 1: Hot Spot Eyes (X-Small) - Olive
Eyes 2: Mono Dumbbells (Large) - Black
Hot Spot: Rabbit Strip - Orange
Claws: Crab Chenille - Olive
Under-Body: Estaz Petite - White
Legs: Marsh Legs - Olive/White - Blue Tip
Shell: Easy Crab Shells - (Medium) - Olive
Wing: Rabbit Strip - Olive
Thread: SCFC Flat Waxed Nylon - Olive
Hook: Size 4 - Ahrex SA210
Black/Purple
Eyes 1: Hot Spot Eyes (X-Small) - Purple
Eyes 2: Mono Dumbbells (Large) - Black
Hot Spot: Rabbit Strip - Purple
Claws: Crab Chenille - Black
Under-Body: Estaz Petite - Purple
Legs: Marsh Legs - Clear/Black - Purple Tip
Shell: Easy Crab Shells - Black
Wing: Rabbit Strip - Black
Thread: SCFC Flat Waxed Nylon - Purple
Hook: Size 4 - Ahrex SA210
Sight Cast Fishing Company
Our passion is saltwater fly fishing and we aim to provide top quality flies and fly tying materials designed for all the fly fishermen that live and breathe the shallow flats and backwater marshes. Many of the materials used in this fly are available in the Tying Materials section of the website. You can also purchase this fly and many others that are already tied up and ready to fish in the Fly Shop. Good luck out there on the water!